# 3 Simple Steps To Setup Authentication in Next.js
In this tutorial, we will see how to easily set up authentication for Next.js apps.
## Step 1. Create Next.js application
```sh
yarn create next-app next-auth
# npx create-next-app next-auth
```
This will create a new Next.js application. You can remove unnecessary files and make the structure as below.
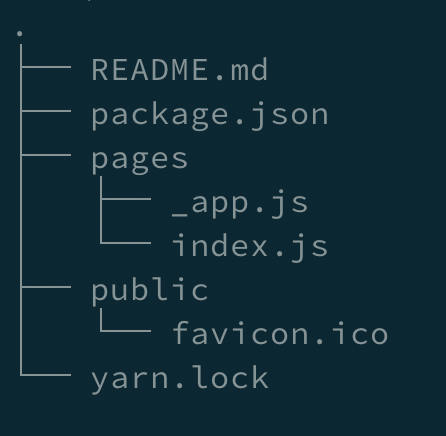
My `pages/index.js` just contains the following
```js
// pages/index.js
export default function Home() {
return (
Hello World
)
}
```
## Step 2: Install NextAuth and SQLite packages
I will be using SQLite as my database for this tutorial, but `next-auth` supports all of the popular databases.
```sh
yarn add next-auth sqlite3
# npm install next-auth sqlite3
```
## Step 3: Setup NextAuth API Route
Create a file with name `[...nextauth].js` under `/pages/api/auth` and add the following content in it.
```js
// pages/api/auth/[...nextauth].js
import NextAuth from 'next-auth'
import Providers from 'next-auth/providers'
const options = {
providers: [
Providers.GitHub({
clientId: process.env.GITHUB_ID,
clientSecret: process.env.GITHUB_SECRET
}),
],
database: process.env.DATABASE_URL,
}
export default (req, res) => NextAuth(req, res, options)
```
Now, all the calls made to `/api/auth/*` will be handled by `next-auth`.
In this example, only the GitHub authentication provider is added. But `next-auth` supports all of the following providers by default.
```
Apple Email Okta
Auth0 Facebook Reddit
Basecamp GitHub Slack
BattleNet GitLab Spotify
Box Google Twitch
Cognito IdentityServer4 Twitter
Credentials LinkedIn Yandex
Discord Mixer
```
You can even add your own provider. More details [here](https://next-auth.js.org/configuration/providers#using-a-custom-provider).
Create `.env.local` file at the root of the project and add the environment keys that we used in the `[...nextauth].js` file.
```
# .env.local
GITHUB_ID=a8451b4a*********
GITHUB_SECRET=95be17c33**********
DATABASE_URL=sqlite://localhost/:memory:?synchronize=true
```
Replace values for `GITHUB_ID` and `GITHUB_SECRET` with your own keys. You can follow the steps described [here](https://developer.github.com/apps/building-oauth-apps/creating-an-oauth-app/). While creating that OAuth app, add `http://localhost:3000/api/auth` as `Authorization callback URL`. The rest of the fields, you can fill with anything.
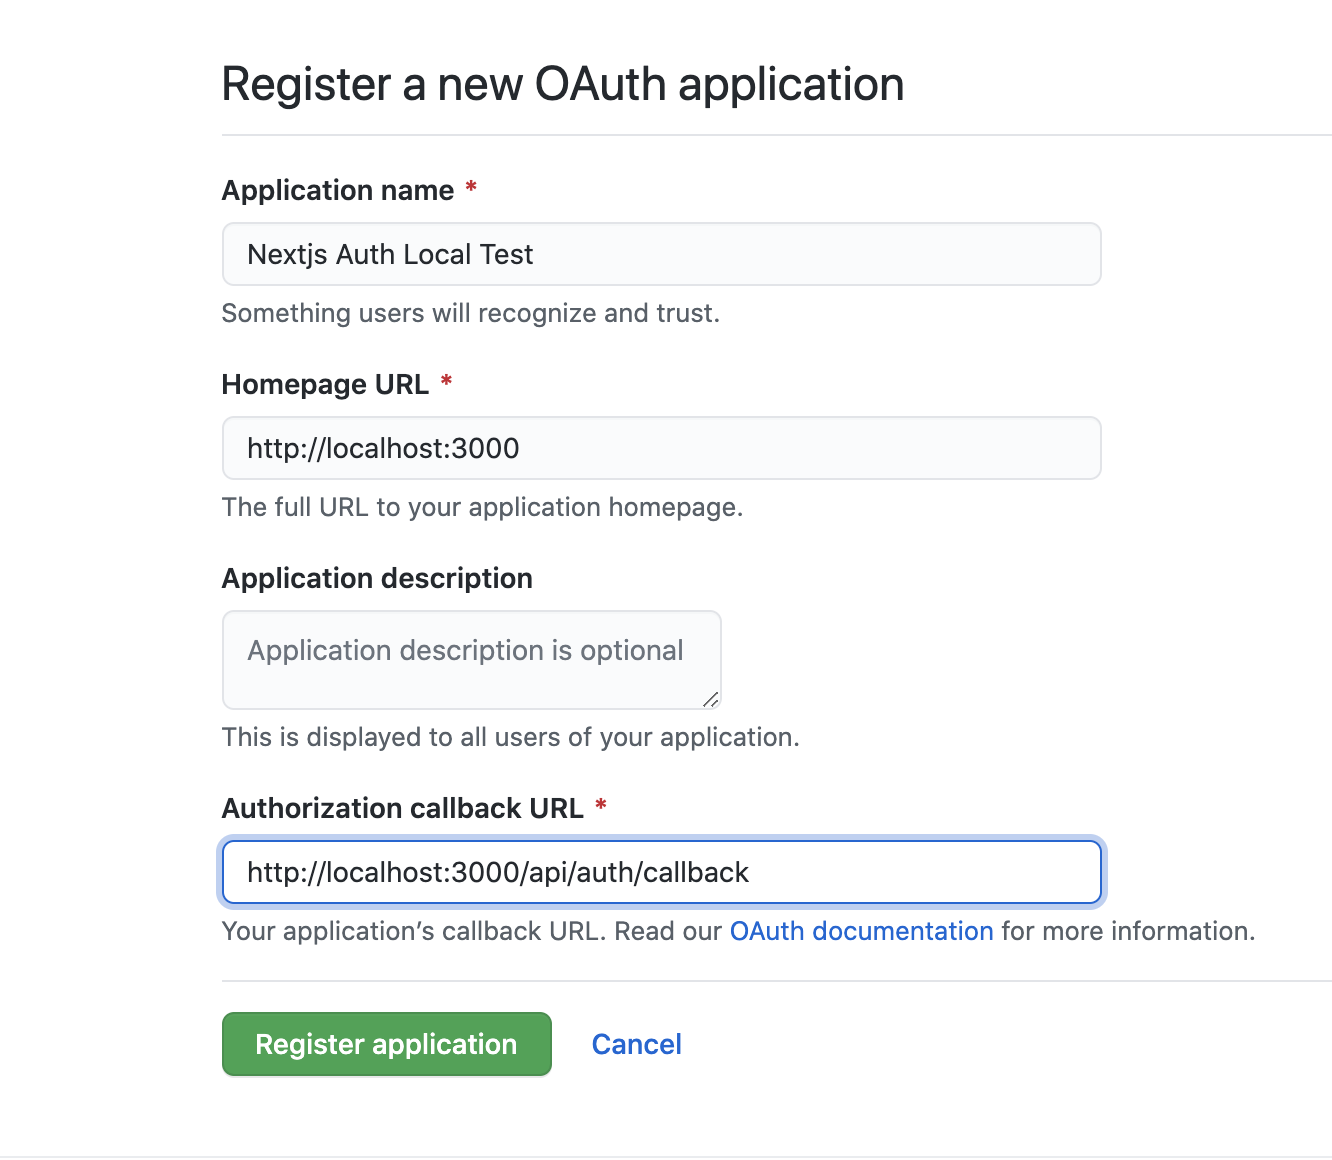
After this, go to https://github.com/settings/developers and open the newly created OAuth App to get `GITHUB_ID` and `GITHUB_SECRET` and add them to the `.env.local` file.
Now, add `SignIn` and `SignOut` buttons in your `index.js` page.
```
// pages/index.js
import { signIn, signOut, useSession } from 'next-auth/client'
export default function Home() {
const [ session ] = useSession()
return (
Hello World
{session ? (
) : (
)}
{session && (
Signed in as
{session.user.email || session.user.name}
)}
)
}
```
That's it. Your app now has GitHub authentication setup.

If you want to see a more full-fledged example, you can download [official next-auth-example](https://github.com/nextauthjs/next-auth-example) provided by [NextAuth.js](https://next-auth.js.org/).
Another important thing to note here is that `NextAuth.js` can be used with or without a database. It also has a password-less login built-in similar to the one you have on @[Hashnode](@hashnode). You just have to provide the EMAIL_SERVER details, and you are set up. This package makes setting up authentication a breeze. You no longer need to have a separate backend just for the sake of having authentication.
### Links and References:
- [NextAuth.js](https://next-auth.js.org/)
- [Next.js](https://nextjs.org)
## What's Next?
The next article will most probably be a part of [My Review of Kent C. Dodds's EpicReact.Dev](https://hashnode.com/series/my-review-of-kent-c-doddss-epicreactdev-ckfv4gidh08efu9s1408v8tgp) series. Go to that series page to know more.
#### Until Next Time 👋
If you liked this article, check out
- [Add Typescript to your Next.js project](https://blog.bhanuteja.dev/add-typescript-to-your-nextjs-project)
- [How to Import SVGs into your Next.js Project?](https://blog.bhanuteja.dev/how-to-import-svgs-into-your-nextjs-project)
You can @ me on Twitter ([@pbteja1998](https://twitter.com/pbteja1998)) with comments, or feel free to follow me.
%%[newsletter]